
1、You are in restricted area and need password. Please Contact us to obtain documents.
2、PasswordIf you have any questions about quotation or cooperation, please feel free to send us inquiry. Inquiry us
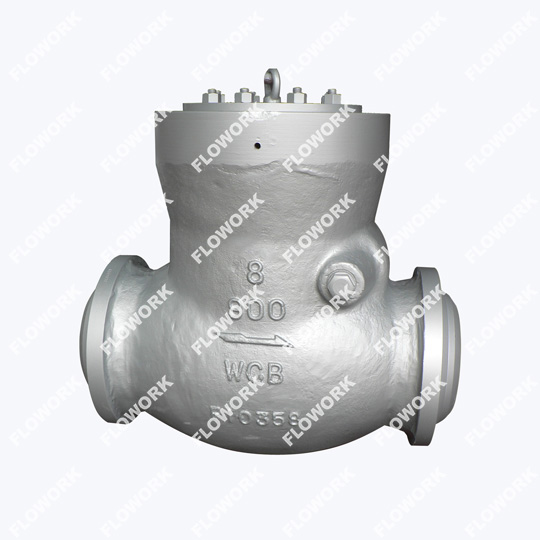
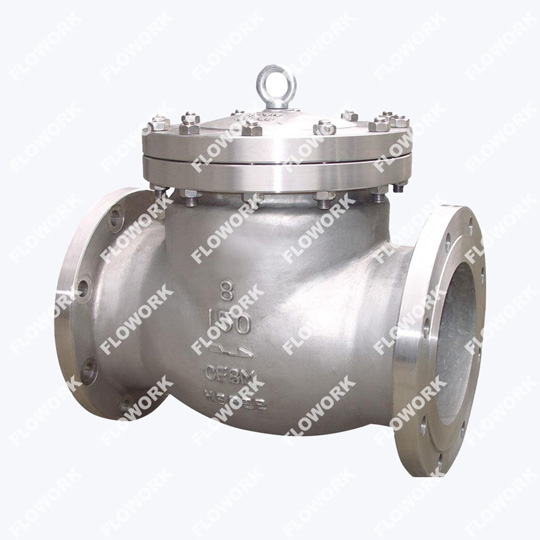
| Size: | 2"-36" |
| Pressure: | 150LB-2500LB |
| Body Material: | CD3MNWCuN, CW2M, Monel, CN7M, 20#Alloys, 4A, 5A, C95800, C95500, F51, F55 etc. |
| Seal Material: | STELLITE, 13Cr, SS304, SS316, etc. |
| Connection Type: | Flanged, Butt Welded, Socket Welded, NPT |
| Face to Face Dimension: | ASME B16.10 |
| Flange End Dimension: | ASME B16.5 |
| Butt Welded Dimension: | ASME B16.25 |
| Design and Manufacture: | BS1868,API 6D |
| Test Standard: | API 598,API 6FA, ISO 15848-1-2 |
Special alloy materials are with high abrasion resistance and corrosion resistance.
Applicable for high temperature working conditions
Fire-safe design, high reliability
Available with swing type, lift type, wafer type, etc.
Bolted bonnet & welded bonnet & pressure seal bonnet & union bonnet
Yes, check valves can be used in both plumbing and heating systems. In plumbing systems, check valves are commonly used to prevent backflow of water or sewage. They ensure that water flows in the desired direction and prevent contamination of the water supply. For example, a check valve may be installed on a sewer line to prevent sewage from flowing back into the building. api 6d ball valve
In heating systems, check valves are used to control the flow of hot water or steam. They help maintain the proper flow direction and prevent the mixing of hot and cold water. For instance, a check valve may be installed on a hot water supply line to prevent the hot water from flowing back into the cold water supply.
Check valves play an important role in both plumbing and heating systems by ensuring the proper flow direction and preventing backflow, which can cause damage or contamination. It's important to select the appropriate type and size of check valve for your specific application and consult with professionals or follow manufacturer guidelines for proper installation. forged ball valve
To adjust a check valve, follow these general steps:
1. Identify the type of check valve: There are different types of check valves, such as swing check valves, lift check valves, and ball check valves. Each type may have a different adjustment method, so it's important to know the specific type of check valve you are working with. carbon steel gate valves
2. Locate the adjustment mechanism: Some check valves have an external adjustment mechanism, such as a screw or lever, while others may require disassembly to access the internal components for adjustment. Refer to the manufacturer's instructions or consult a professional if you are unsure about the adjustment mechanism.
3. External adjustment: If your check valve has an external adjustment mechanism, such as a screw or lever, you can typically adjust it by turning the screw or moving the lever. Clockwise rotation or movement may increase the pressure required to open the valve, while counterclockwise rotation or movement may decrease the pressure required.
4. Internal adjustment: If your check valve requires disassembly for adjustment, carefully follow the manufacturer's instructions. This may involve removing the valve from the pipeline and disassembling the valve body to access the internal components. Adjustments can be made by changing the spring tension or modifying the position of internal components. Take caution to reassemble the valve correctly after making adjustments.
5. Test and observe: After making adjustments, reassemble the check valve (if necessary) and reinstall it in the pipeline. Test the valve by running fluid through the system and observe its performance. Ensure that the valve opens and closes properly and that it effectively prevents backflow.
It's important to note that not all check valves are adjustable. Some check valves are designed to operate at a specific pressure or flow rate and cannot be adjusted. Always refer to the manufacturer's instructions or consult a professional for specific guidance on adjusting your check valve.
To replace a check valve, follow these general steps:
1. Turn off the water supply: Before replacing the check valve, turn off the water supply to the system to prevent any water from flowing through the pipes.
2. Identify the type of check valve: There are different types of check valves, such as swing check valves, lift check valves, and ball check valves. Each type may have a different replacement method, so it's important to know the specific type of check valve you are working with. high temperature gate valves
3. Remove the old check valve: Depending on the type of check valve, you may need to use a wrench or pliers to loosen and remove the valve from the pipeline. Some check valves may require disassembly to access the internal components for removal. Refer to the manufacturer's instructions or consult a professional if you are unsure about the removal process.
4. Clean the pipeline: After removing the old check valve, clean the pipeline to remove any debris or buildup that may have accumulated.
5. Install the new check valve: Install the new check valve in the pipeline, following the manufacturer's instructions. Ensure that the valve is installed in the correct orientation and that any gaskets or seals are properly in place.
6. Test and observe: After installing the new check valve, turn on the water supply and test the valve by running fluid through the system. Observe its performance to ensure that it opens and closes properly and that it effectively prevents backflow.
It's important to note that replacing a check valve can be a complex process, and it may be best to consult a professional if you are unsure about any aspect of the replacement process. Additionally, always refer to the manufacturer's instructions for specific guidance on replacing your check valve
To test a check valve, you can follow these steps:
1. Turn off the water supply: Before testing the check valve, make sure to turn off the water supply to the system to prevent any water from flowing through the pipes.
2. Visual inspection: Start by visually inspecting the check valve for any signs of damage or wear. Look for cracks, leaks, or any other visible issues that may affect its performance, low temperature ball valves.
3. Check for proper installation: Ensure that the check valve is installed in the correct orientation. The arrow or flow direction indicator on the valve should be pointing in the direction of the desired flow.
4. Blow or suction test: Depending on the type of check valve, you can perform a blow or suction test. For a blow test, use compressed air or a pump to blow air into the valve. The valve should close and prevent air from flowing back. For a suction test, use a vacuum or your mouth to create suction on the outlet side of the valve. The valve should open and allow air or fluid to flow through.
5. Water flow test: If the check valve is installed in a water system, you can also perform a water flow test. Turn on the water supply and observe the flow through the valve. It should allow water to flow in one direction but prevent backflow in the opposite direction, api602 forged gate valve.
6. Observe for leaks: While testing the check valve, keep an eye out for any leaks or abnormal behavior. If you notice any leaks or the valve fails to function properly, it may need to be repaired or replaced.
Remember, the specific testing method may vary depending on the type and design of the check valve. Always refer to the manufacturer's instructions for the recommended testing procedure for your specific valve. If you are unsure or uncomfortable performing the test yourself, it's best to consult a professional plumber or technician.
The Cv (flow coefficient) for a check valve is a measure of its flow capacity. It represents the amount of water (in gallons per minute) that can pass through the valve with a pressure drop of 1 psi (pound per square inch). The Cv value is typically provided by the manufacturer and is used to compare the flow capacities of different check valves.
A higher Cv value indicates a larger flow capacity, meaning the check valve can allow more water to pass through. It is important to select a check valve with an appropriate Cv value based on the desired flow rate and system requirements.
Keep in mind that the Cv value is specific to water flow and may vary for different fluids or gases. It is always recommended to consult the manufacturer's specifications or engineering resources for accurate Cv values and selection guidance for a specific check valve.
Send us a message if you have any questions or request a quote.

A reply from our experts within 24 hours
The latest detailed product catalugue
One-stop service for your project