
1、You are in restricted area and need password. Please Contact us to obtain documents.
2、PasswordIf you have any questions about quotation or cooperation, please feel free to send us inquiry. Inquiry us
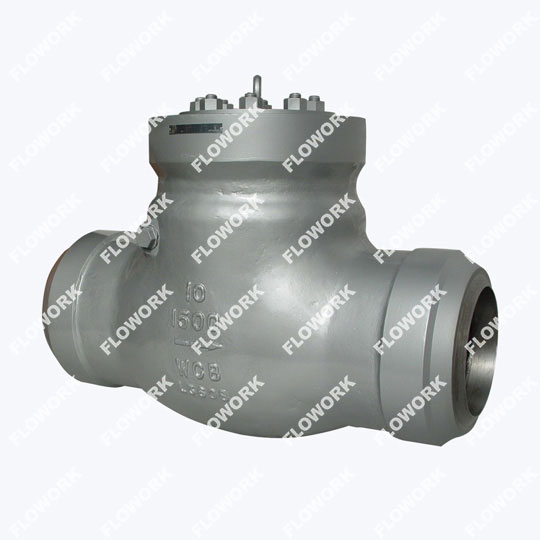
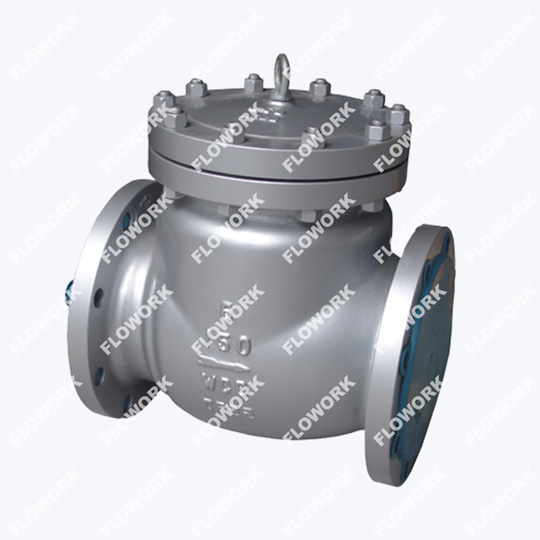
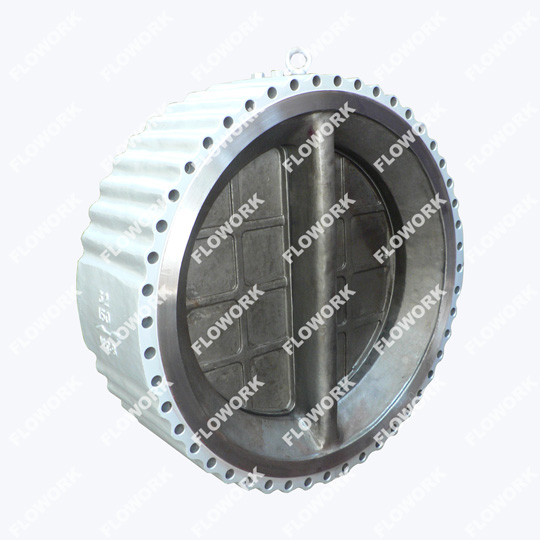
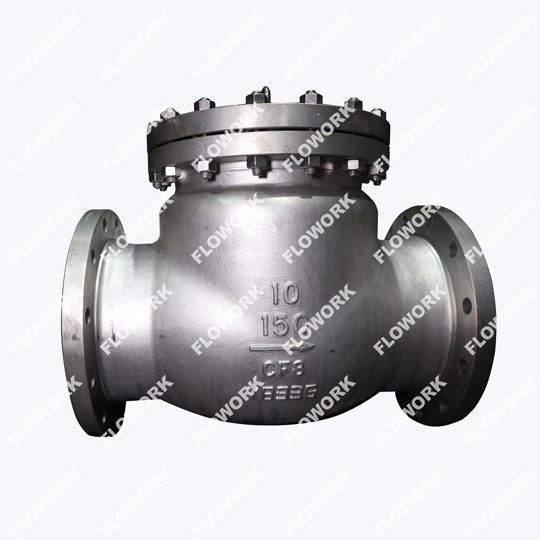
| Size: | 2"-36" |
| Pressure: | 150LB-2500LB |
| Body Material: | CF8, CF8M, CF3, CF3M, CN7M, LC1, LC2, LC3, LCB, LCC, Monel, 20# Alloys, 4A, 5A, F304, F304L, F316, F316L, LF1, LF2, LF3, LF9, F51, F53, etc. |
| Seal Material: | STELLITE, 13Cr, SS304, SS316, etc. |
| Connection Type: | Flanged, Butt Welded, Socket Welded, NPT |
| Face to Face Dimension: | ASME B16.10 |
| Flange End Dimension: | ASME B16.5 |
| Butt Welded Dimension: | ASME B16.25 |
| Design and Manufacture: | BS1868,API 6D,BS 6364-1984,SHELL MESC SPE 77/200,MSS SP - 134 - 2018 |
| Test Standard: | API 598,API 6FA, ISO 15848-1-2 |
Suitable for the cryogenic/low temperature service
Generally with extended bonnet to protect the packing material performance
Operate the cryogenic treatment when the temperature below minus 100 Degrees Celsius
Suitable for lowest temperature to minus 196 Degrees Celsius environment
Adopt low temperature material such as LCB/CF8/CF8M, etc.
To install a check valve, follow these general steps:
1. Identify the correct location: Determine where the check valve needs to be installed in the piping system. It is typically placed in a vertical position, with the flow direction indicated on the valve body.
2. Prepare the piping: Cut the pipe at the desired location using a pipe cutter or saw. Ensure that the pipe ends are clean, smooth, and free from any debris or burrs.
3. Apply thread sealant (if applicable): If the check valve has threaded connections, apply an appropriate thread sealant to the male threads. This helps create a tight seal and prevents leakage. api 6d ball valve
4. Connect the valve: Attach the check valve to the pipe by screwing it onto the threaded connections or using the appropriate fittings, such as couplings or compression fittings. Ensure that the valve is aligned with the flow direction indicated on the valve body.
5. Tighten the connections: Use a wrench or pliers to tighten the connections securely. Be careful not to overtighten, as it may damage the valve or the pipe.
6. Test for leaks: Once the check valve is installed, turn on the fluid supply and check for any leaks around the connections. If there are any leaks, tighten the connections further or apply additional sealant as needed. forged ball valve
7. Inspect and maintain: Regularly inspect the check valve for any signs of wear or damage. Clean or replace the valve if necessary to ensure proper functioning.
It is important to note that the specific installation process may vary depending on the type of check valve and the piping system. Always refer to the manufacturer's instructions and guidelines for the specific check valve being installed. carbon steel gate valves
Yes, check valves can be made with a full bore design. A full bore check valve is designed to have the same internal diameter as the pipe it is installed in, allowing for unrestricted flow of fluid or gas. This design minimizes pressure drop and ensures efficient flow through the valve. Full bore check valves are commonly used in applications where low flow resistance and high flow capacity are required, such as in large pipelines or systems with high flow rates. However, it is important to note that the availability of full bore check valves may vary depending on the specific manufacturer and the size range of the valves they offer. high temperature gate valves
To replace a check valve on a well pump, you will need to follow these steps:
1. Turn off the power to the well pump.
2. Close the valve between the well pump and the pressure tank.
3. Drain the water from the pressure tank.
4. Remove the old check valve from the well pump.
5. Install the new check valve onto the well pump.
6. Reconnect the valve between the well pump and the pressure tank.
7. Turn on the power to the well pump, low temperature ball valves.
8. Open a faucet to allow the water to flow and fill the pressure tank.
9. Check for leaks and make sure the pressure tank is properly pressurized.
Note: It is recommended to consult a professional if you are not familiar with well pump systems or if you encounter any issues during the replacement process.
To determine if a check valve is bad, you can perform the following checks:
1. Visual inspection: Look for any visible signs of damage, such as cracks, leaks, or corrosion on the valve body or components. These can indicate a faulty check valve.
2. Leakage test: Apply pressure or flow to the valve and observe if there is any leakage. A properly functioning check valve should prevent backflow or reverse flow. If you notice any flow in the opposite direction or leakage, it may indicate a faulty valve, api602 forged gate valve.
3. Audible check: Listen for any unusual sounds when the valve is in operation. A clicking or rattling noise could indicate a worn-out or damaged check valve.
4. Backflow prevention: Check if the valve effectively prevents backflow. You can do this by applying pressure or flow in the reverse direction and observing if the valve closes properly. If backflow occurs or the valve fails to close completely, it may indicate a faulty check valve.
5. Performance testing: If possible, compare the performance of the check valve with a known good valve. This can be done by measuring the pressure drop or flow rate across both valves. A significant difference in performance may indicate a faulty check valve.
If you suspect that a check valve is bad based on these checks, it is recommended to replace the valve with a new one. Faulty check valves can lead to system inefficiencies, leaks, or even system failures. Consult the manufacturer's guidelines or seek professional assistance for proper diagnosis and replacement of the check valve.
To use a check valve, follow these steps:
1. Identify the flow direction: Check valves are designed to allow flow in one direction and prevent backflow in the opposite direction. Look for an arrow or directional indicator on the valve body that shows the intended flow direction.
2. Installation: Install the check valve in the desired pipeline or system according to the manufacturer's instructions. Ensure that it is properly aligned and securely fastened. Make sure the valve is installed in the correct orientation to allow flow in the desired direction.
3. Flow control: When the flow is in the intended direction, the check valve will open automatically, allowing fluid or gas to pass through. Ensure that the valve is fully open to minimize pressure drop and maximize flow efficiency.
4. Backflow prevention: When the flow tries to reverse, the check valve will close automatically to prevent backflow. This helps maintain the integrity of the system and prevents contamination or damage.
5. Maintenance: Regularly inspect the check valve for any signs of damage, such as leaks, cracks, or corrosion. Clean or replace the valve if necessary to ensure proper functioning.
6. System shutdown: If you need to shut down the system or pipeline, ensure that the check valve is closed to prevent any backflow or leakage.
Remember to consult the manufacturer's instructions for specific guidelines on using the check valve, as different types of check valves may have slightly different operating procedures.
Send us a message if you have any questions or request a quote.

A reply from our experts within 24 hours
The latest detailed product catalugue
One-stop service for your project