
1、You are in restricted area and need password. Please Contact us to obtain documents.
2、PasswordIf you have any questions about quotation or cooperation, please feel free to send us inquiry. Inquiry us
| Size: | 2"-36" |
| Pressure: | 150LB-2500LB |
| Body Material: | WCB, WC6, WC9, CF8, CF8M, CF3, CF3M, CN7M, LC1, LC2, LC3, LCB, LCC, Monel, 20# Alloys, 4A, 5A, C95800, C95500, A105, F304, F304L, F316, F316L, LF1, LF2, LF3, LF9, F51, F53, F11, F22, etc. |
| Seal Material: | STELLITE, 13Cr, SS304, SS316, etc. |
| Connection Type: | Wafer |
| Face to Face Dimension: | ASME B16.10 |
| Flange End Dimension: | ASME B16.5 |
| Design and Manufacture: | API 594 |
| Test Standard: | API 598,API 6FA, ISO 15848-1-2 |
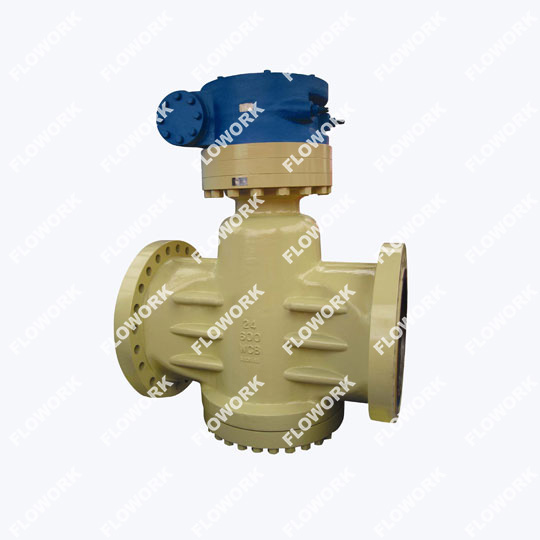
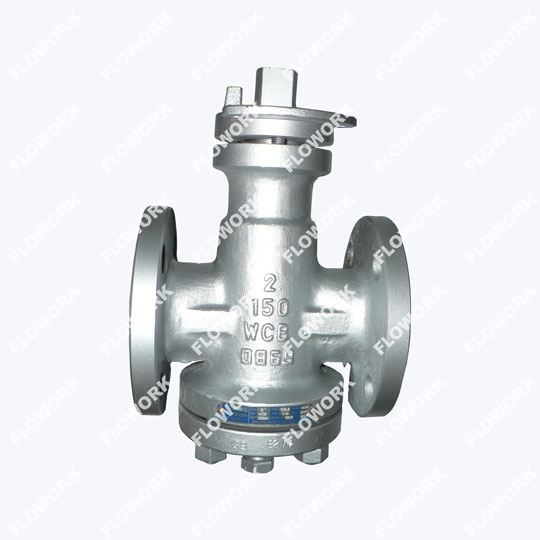
Smooth flow path, small fluid resistance, flexible operation, excellent sealing performance
Available in both single disc type and double disc type
Working temperature: -196~540℃, pressure range: 150LB-2500LB
By choosing different materials, it can be applied to water, steam, oil, nitric acid, acetic acid, strong oxidizing medium, urea, and other media.
Installing a double check valve assembly (DCVA) is typically done to provide backflow prevention in a water supply system. A DCVA consists of two check valves installed in series to ensure additional protection against backflow. Here's a general guide on how to install a double check valve assembly:
**Important Note:** Always follow the manufacturer's installation instructions and consult local plumbing codes or regulations, as they may have specific requirements for backflow prevention devices. api 6d ball valve
1. **Select the Location:**
- Choose a suitable location for the DCVA installation, typically downstream of a point of potential contamination, such as a sprinkler system, chemical injection point, or industrial process.
2. **Turn Off Water Supply:**
- Shut off the water supply to the area where you plan to install the DCVA. Ensure that the area is depressurized before beginning the installation.
3. **Prepare the Piping:**
- Cut the water supply pipe at the chosen installation point using a pipe cutter or hacksaw. Ensure the cut ends are clean, smooth, and free from burrs. forged ball valve
4. **Install Shut-off Valves (Optional):**
- It is common practice to install isolation valves on both sides of the DCVA. This allows for easier servicing and testing of the DCVA without needing to shut off water to the entire system.
5. **Install the DCVA:**
- Place the double check valve assembly in the desired location, with the flow direction arrow pointing in the correct direction (usually marked on the assembly). The assembly should be installed vertically and oriented as indicated by the manufacturer's instructions. carbon steel gate valves
6. **Connect the Pipes:**
- Connect the pipes to the inlet and outlet sides of the DCVA using suitable pipe fittings (e.g., union fittings). Ensure that the connections are tight and leak-free.
7. **Secure the DCVA:**
- Properly support and secure the DCVA to the mounting surface using appropriate clamps or brackets. This prevents unnecessary stress on the assembly and pipes.
8. **Test and Flushing:**
- After the installation is complete, open the isolation valves (if installed) and slowly turn on the water supply. Check for any leaks or abnormalities in the system. high temperature gate valves
9. **Check for Proper Function:**
- Verify that the DCVA operates correctly by checking for flow through both check valves and ensuring they seal properly when there is backflow. You can conduct a field test as recommended by the manufacturer.
10. **Backflow Preventer Recordkeeping:**
- Keep detailed records of the installation date, maintenance, and testing of the DCVA, as this is often required by local regulations.
11. **Annual Testing:**
- DCVAs typically require annual testing to ensure they are functioning correctly. Consult local regulations and manufacturer recommendations for testing procedures.
Always consult with a qualified plumber or backflow prevention specialist when installing a double check valve assembly, especially if you are unfamiliar with backflow prevention devices. Improper installation can lead to potential health hazards and non-compliance with local regulations.
Testing a double check valve assembly (DCVA) is an essential part of ensuring it functions correctly to prevent backflow in a water supply system. Regular testing helps identify any issues and ensures the DCVA is providing effective backflow prevention. Here's how to test a double check valve assembly:
**Important Note:** Always follow the manufacturer's testing instructions and consult local plumbing codes or regulations, as they may have specific requirements for testing backflow prevention devices.
1. **Gather Necessary Tools:**
- Before testing, gather the tools and equipment you will need. This may include a suitable test kit, gauges, and any required test cock adapters.
2. **Shut Off Water Supply:**
- Ensure that the water supply to the DCVA is turned off. Isolate the DCVA from the rest of the system to prevent any cross-contamination during testing.
3. **Prepare Test Cocks:**
- Most DCVAs have test cocks, small valves or ports for attaching test gauges and equipment. Locate the test cocks on the DCVA and ensure they are accessible.
4. **Inspect the Assembly:**
- Visually inspect the DCVA for any visible signs of damage, corrosion, or wear. Ensure that all components are in good condition, low temperature ball valves.
5. **Prepare Test Gauges:**
- Connect the appropriate test gauges to the test cocks. You will need two gauges, one on each side of the DCVA (upstream and downstream).
6. **Pressure Test:**
- With the test gauges in place, gradually turn on the water supply to the DCVA. Monitor the pressure on the upstream and downstream sides of the DCVA to ensure it maintains pressure within the assembly.
7. **Backflow Test:**
- After conducting the pressure test, introduce a simulated backflow condition by manually creating a reverse flow. This can typically be done using a test kit designed for DCVA testing.
- Verify that the DCVA closes and prevents backflow. The downstream gauge should show a drop in pressure as the check valves close, while the upstream gauge should remain steady.
- Check for any leaks or other issues during this test.
8. **Field Test and Verification:**
- A field test is often required to ensure that the DCVA meets specified criteria. Follow the procedures recommended by the manufacturer or local regulations. Field testing may involve checking various aspects of the DCVA's performance.
9. **Documentation:**
- Keep detailed records of the test, including the test date, results, and any maintenance or repairs that were conducted. Documentation is often required by local authorities and is essential for compliance.
10. **Annual Testing:**
- DCVAs typically require annual testing to ensure they are functioning correctly. Consult local regulations and manufacturer recommendations for testing procedures.
If you are unfamiliar with the testing procedures for a double check valve assembly or are unsure about how to conduct the test, it is advisable to consult with a qualified backflow prevention specialist or a certified tester who can perform the testing according to local regulations and guidelines.
Installing a wafer check valve is a relatively straightforward process. Wafer check valves are commonly used in piping systems to prevent backflow, and they are designed to fit between flanges, making installation easier. Here are the general steps for installing a wafer check valve:
**Note:** Always follow the manufacturer's installation guidelines and consult local plumbing codes or regulations for any specific requirements in your area, api602 forged gate valve.
**Tools and materials you may need:**
- Appropriate-sized wafer check valve
- Flange gaskets
- Flange bolts
- Wrench or socket set
- Torque wrench (for bolt tightening)
- Pipe thread sealant or gasket compound (if required)
**Installation Steps:**
1. **Select the Location:** Choose the location where you want to install the wafer check valve. Ensure that it is the appropriate size for the pipe diameter and that it is compatible with the type of fluid and pressure conditions in your system.
2. **Inspect the Valve:** Before installation, inspect the wafer check valve for any visible signs of damage or defects. Ensure that the valve is in good condition.
3. **Prepare the Piping:** Cut the pipe to the correct length if needed and make sure the pipe ends are clean and free from burrs. If you are replacing an existing check valve, remove the old valve and clean the flange faces thoroughly.
4. **Position the Valve:** Place the wafer check valve between the flanges on the pipe. Align the holes in the valve with the bolt holes in the flanges. The valve should fit snugly between the flanges.
5. **Insert Gaskets:** Install gaskets between the wafer check valve and the flanges on both sides. These gaskets create a seal between the valve and the flanges.
6. **Secure with Bolts:** Insert flange bolts through the bolt holes in the valve and the flanges. Hand-tighten the bolts initially to ensure proper alignment.
7. **Tighten Bolts:** Using a wrench or socket set, evenly tighten the flange bolts in a crisscross pattern. Gradually increase the torque on each bolt until they are securely tightened. Be careful not to overtighten, as this can damage the gaskets or the valve.
8. **Inspect for Leaks:** After the valve is securely in place, visually inspect the installation for any visible leaks or gaps. Pay attention to the gasket areas and flange connections.
9. **Test the Valve:** Once installed, test the wafer check valve to ensure it functions as expected. You can test it by running fluid through the system and monitoring for proper operation, including opening and closing as needed.
10. **Securely Anchor the Piping:** Ensure that the piping leading to and from the wafer check valve is adequately supported and anchored to prevent excessive stress on the valve and the flanges.
11. **Document the Installation:** Keep records of the installation, including the date, manufacturer, and any pertinent information. This documentation can be valuable for maintenance and compliance purposes.
Remember that proper installation is critical for the wafer check valve to function effectively. If you are unsure about any aspect of the installation process, it's advisable to consult with a qualified plumber or technician with experience in valve installation.
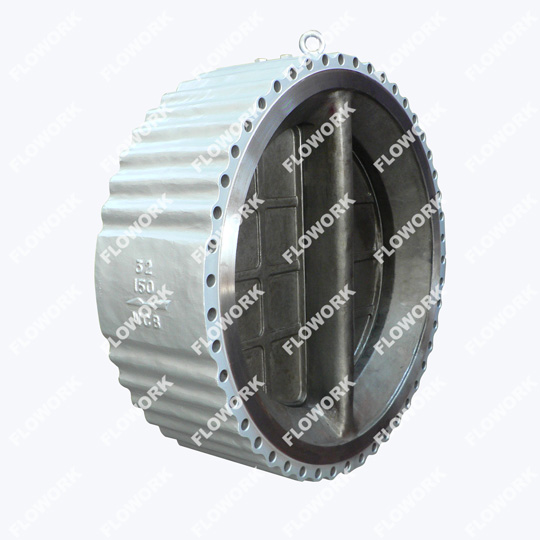
A wafer type check valve is a type of check valve that is designed to fit between two flanges in a pipeline. It is called a "wafer" type because of its thin, wafer-like shape. This design allows for easy installation and removal without the need for additional hardware, such as bolts and nuts.
The wafer type check valve operates by using a disc or plate that swings open and closes in response to the flow of fluid. When the fluid flows in the forward direction, the disc is pushed open, allowing the fluid to pass through. However, when the flow reverses, the disc swings closed, preventing backflow.
Wafer type check valves are commonly used in applications where space is limited and a compact design is required. They are often used in HVAC systems, water and wastewater treatment plants, and various industrial processes. It is important to note that wafer type check valves are not suitable for applications with high pressure or high temperature conditions, as they may not provide the necessary sealing and strength required.
The sealing material commonly used for big size wafer check valves is usually a combination of metal and soft materials, such as stainless steel and EPDM or NBR rubber. The metal provides strength and durability, while the soft material provides a tight seal to prevent backflow.
Send us a message if you have any questions or request a quote.

A reply from our experts within 24 hours
The latest detailed product catalugue
One-stop service for your project