
| Size: | 2"-36" |
| Pressure: | 150LB-2500LB |
| Body Material: | WCB, WC6, WC9, CF8, CF8M, CF3, CF3M, CN7M, LC1, LC2, LC3, LCB, LCC, Monel, 20# Alloys, 4A, 5A, C95800, C95500, A105, F304, F304L, F316, F316L, LF1, LF2, LF3, LF9, F51, F53, F11, F22, etc. |
| Seal Material: | PTFE, METAL SEAT |
| Connection Type: | Flanged, Butt Welded, Socket Welded, NPT |
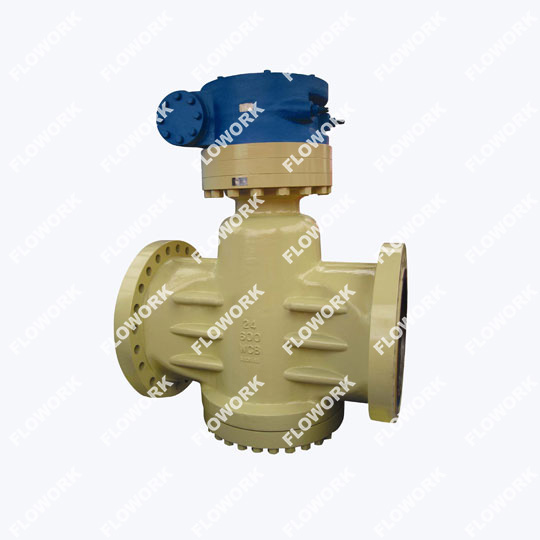
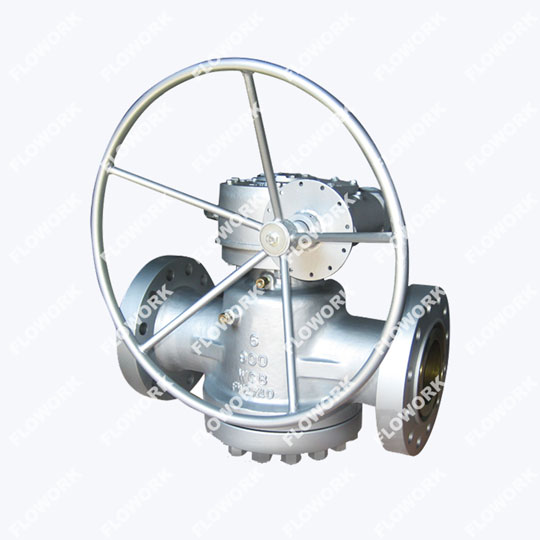
| Operation: | Handwheel, gear operated, pneumatic, motorized |
| Face to Face Dimension: | ASME B16.10 |
| Flange End Dimension: | ASME B16.5 |
| Butt Welded Dimension: | ASME B16.25 |
| Design and Manufacture: | API 6D |
| Test Standard: | API 598, API 607, API 6FA, ISO 15848-1-2 |
They can be manually operated, with a wrench, a worm or an actuator.
Big size plug valve can come up to 40 inches.
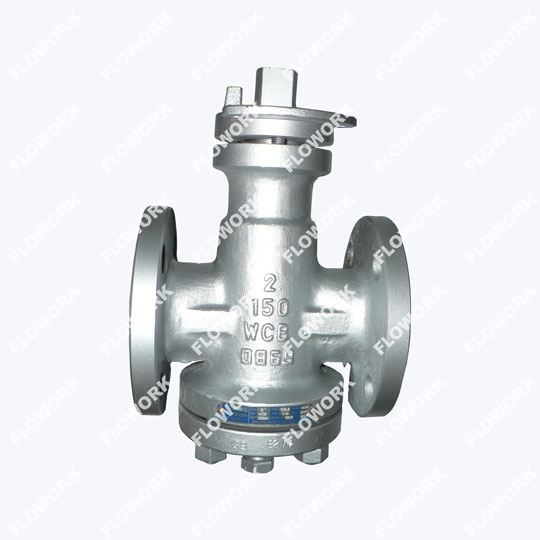
Lubricated type is one of the most commonly used plug valve types.
Non lubricated type acts as a wedge and presses a soft-material sleeve against the body cavity.
Three main types of non-lubricated valves are: fully lined, elastomer sleeve and lift-type plug valve.
They are ideal valve types for handling dirty liquids, sludge, slurry and gases.
If you have determined that the outdoor faucet backflow valve is leaking, it's important to address the issue promptly to prevent water waste and potential damage. Here's a step-by-step guide to help you plug an outdoor faucet backflow valve:
Turn off the water supply: Locate the water shut-off valve that controls the flow to the outdoor faucet. It is typically located near the faucet or in the basement. Turn the valve clockwise to shut off the water supply, Ball Valve Factory.
Release pressure: Open the faucet to relieve any remaining pressure in the system. This step is crucial to avoid unnecessary complications when working on the backflow valve.
Remove the backflow valve: Depending on the specific type of backflow valve you have, it may have screws or other fasteners holding it in place. Use the appropriate tools to remove these fasteners and detach the valve from the faucet.
Inspect the valve: Examine the backflow valve for any signs of damage, such as cracks or worn-out seals. If the valve is severely damaged, it may need to be replaced. However, if it's a minor leak, you can proceed to the next step.
Apply plumber's tape or sealant: Take plumber's tape or a suitable sealant and wrap it around the threads of the backflow valve. This will help create a tight seal and prevent any leaks.
Reinstall the backflow valve: Place the backflow valve back onto the faucet and secure it with the appropriate fasteners. Ensure that it is tightly attached but be careful not to overtighten, as it may cause damage.
Turn on the water supply: Once the backflow valve is securely installed, slowly turn on the water supply by turning the shut-off valve counterclockwise. Monitor the faucet and the backflow valve for any signs of leaks. If you notice any leaks, tighten the valve slightly or consider replacing it if the issue persists, Gate Valve Wholesale.
Test for proper functioning: With the water flowing, test the faucet and check if the backflow valve is working correctly. There should be no leaks or reverse flow from the faucet when you turn it off.
If you're unsure about any of the steps involved or if the leak persists even after attempting to plug it, it's recommended to contact a professional plumber for assistance. They will have the expertise and tools to diagnose and fix the problem effectively, Bronze Valve Supplier.
By following these steps, you can help to prevent stains on the plug valve core and ensure that the valve operates smoothly and efficiently, Check Valve Factory.
To remove a plug from a diverter valve, follow these steps:
Shut off the water supply: Locate the main water shut-off valve for your property and turn it off. This will ensure that no water flows through the plumbing system while you work on the diverter valve.
Release pressure: Open a nearby faucet to relieve any remaining water pressure in the plumbing system. This step is essential to prevent any unexpected water flow when you remove the plug, Wholesale Globe Valve.
Identify the diverter valve: Locate the diverter valve in your plumbing system. It is typically found in the shower or bathtub area, behind the faucet handles or behind a cover plate.
Remove the cover plate (if applicable): If there is a cover plate over the diverter valve, carefully remove it using a screwdriver or an appropriate tool. Some cover plates may be secured with screws, while others may snap or slide off, Butterfly Valve Factory.
Access the plug: Once the cover plate is removed, you should be able to see the plug inside the diverter valve. It may be a small screw, cartridge, or other type of fitting.
Determine the removal method: Depending on the type of diverter valve and plug, the removal method may vary. Common methods include unscrewing, pulling, or pushing the plug out. You may need to consult the manufacturer's instructions or seek guidance specific to your valve type.
Unscrew the plug (if applicable): If the plug is threaded, use an appropriate tool such as a wrench or pliers to grip the plug securely and turn it counterclockwise to unscrew it from the valve.
Pull or push the plug: If the plug is not threaded, you may need to pull it straight out or push it inward and then pull it out, depending on the design of the valve. Use gentle but firm pressure to remove the plug. Be careful not to damage the valve or surrounding components.
Inspect the plug: Once removed, inspect the plug for any signs of damage or wear. If necessary, replace the plug with a new one that matches the specifications of your diverter valve.
Reassemble and test: After removing the plug, reassemble any components that were removed, such as the cover plate. Turn on the water supply and test the diverter valve to ensure proper functioning and check for any leaks, Plug Valve Factory.
If you encounter any difficulties during the removal process or if you are unsure about the specific steps for your particular diverter valve, it is recommended to consult the manufacturer's instructions or seek assistance from a professional plumber.
A rising plug valve is a type of valve that utilizes a cylindrical or conical plug to control the flow of fluid through a pipe or system. The plug has a tapered or cylindrical shape that fits into a corresponding seat within the valve body. By raising or lowering the plug, the valve can open or close to regulate the flow of the fluid.
The distinguishing feature of a rising plug valve is that the plug moves linearly along the axis of the valve as it is operated. When the valve is closed, the plug is fully seated in the valve body, blocking the flow of fluid. As the valve is opened, the plug is raised or lifted, allowing the fluid to pass through the annular space between the plug and the valve body.
Rising plug valves are commonly used in applications that require throttling or on-off control of fluid flow. They are often found in industries such as oil and gas, petrochemical, water treatment, and general industrial processes. These valves are known for their durability, reliability, and ability to handle a wide range of pressures and temperatures.
It's worth noting that there are different variations and designs of plug valves, including lubricated plug valves, non-lubricated plug valves, and sleeved plug valves. Each variant has its own features and applications, but the concept of a plug that moves vertically to regulate the flow remains consistent among them.
The cost of a spark plug and valve replacement can vary depending on several factors, including the make and model of your vehicle, the type of spark plugs and valves needed, the labor rates in your area, and whether you choose to have the work done at a dealership, an independent mechanic, or do it yourself. Additionally, if there are any additional repairs or parts required during the process, it can impact the overall cost.
As an approximate estimate, the cost of a spark plug replacement can range from $80 to $200, including parts and labor. However, if valve replacement is required, it can significantly increase the cost. Valve replacement costs can vary greatly depending on the number of valves that need to be replaced, the type of valves (intake or exhaust), and the complexity of the engine design. Valve replacements can range from a few hundred dollars to over a thousand dollars, including parts and labor.
To get an accurate cost estimate for your specific vehicle, it is best to consult with local mechanics or service centers, providing them with the details of your vehicle and the specific work needed. They will be able to provide you with a more precise estimate based on your situation.
Send us a message if you have any questions or request a quote.

A reply from our experts within 24 hours
The latest detailed product catalugue
One-stop service for your project