
1、You are in restricted area and need password. Please Contact us to obtain documents.
2、PasswordIf you have any questions about quotation or cooperation, please feel free to send us inquiry. Inquiry us
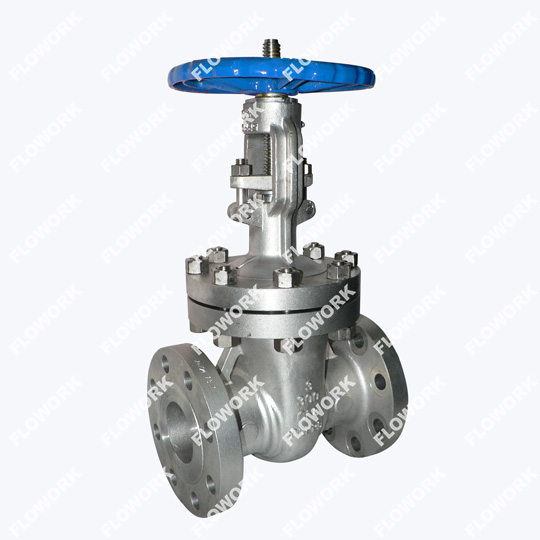
| Size: | 2"-68" |
| Pressure: | 150LB-2500LB |
| Body Material: | WCB, WC6, WC9, CF8, CF8M, CF3, CF3M, CN7M, LC1, LC2, LC3, LCB, LCC, Monel, 20# Alloys, 4A, 5A, C95800, C95500, A105, F304, F304L, F316, F316L, LF1, LF2, LF3, LF9, F51, F53, F11, F22, etc. |
| Seal Material: | STELLITE, 13Cr, SS304, SS316, etc. |
| Connection Type: | Flanged, Butt Welded, Socket Welded, NPT |
| Operation: | Handwheel, gear operated, pneumatic, motorized |
| Face to Face Dimension: | ASME B16.10 |
| Flange End Dimension: | ASME B16.5 |
| Butt Welded Dimension: | ASME B16.25 |
| Design and Manufacture: | API 600 |
| Test Standard: | API 598, API 624, API 6FA, ISO 15848-1-2 |
Perfect sealing performance, protect the environment
Certified by the ISO 15848-1 Fugitive Emission and API 624
Zero leakage for the seat seal place and fugitive emission for the packing seal place
Pass the fugitive emission test successfully for total 1500cycles at high temperature 300℃.
Particularly suitable for pipelines with toxic, flammable and combustible media
If you have a leaking gate valve, it's important to address the issue promptly to prevent further damage and potential safety hazards. Here are the general steps to follow when dealing with a leaking gate valve:
Turn off the water supply: Locate the valve that controls the water flow to the leaking gate valve and turn it off to stop the flow of water, ball valve manufacture.
Drain the water: Open a faucet or drain valve to allow the water in the pipes to drain completely.
Inspect the valve: Check the valve body, gate, and seat for any signs of damage or wear. If the valve is corroded, cracked, or otherwise damaged, it may need to be replaced.
Tighten the packing nut: If the leak is coming from the valve stem, you may be able to stop the leak by tightening the packing nut. Use a wrench to turn the nut clockwise until the leak stops, gate valve manufacture.
Replace the packing: If tightening the packing nut doesn't stop the leak, the packing may need to be replaced. Remove the packing nut and old packing material and replace it with new packing material.
Replace the gate valve: If the valve body or gate is damaged, it may need to be replaced. Follow the steps for replacing a gate valve.
Turn on the water supply: Once the repair is complete, turn on the main water supply valve and open the valve to let water flow through it. Check for any leaks and tighten any connections if necessary.
It's important to note that the exact steps required may vary depending on the specific type of gate valve and the plumbing system. If you are unsure about how to repair a leaking gate valve or encounter any problems during the process, it's recommended to consult with a professional plumber for assistance, bronze valve.
Replacing a gate valve involves several steps and requires some plumbing experience and tools. Here are the general steps to follow when replacing a gate valve:
Shut off the water supply: Locate the main water shut-off valve and turn it off to stop the flow of water to the valve you want to replace. If there is no isolation valve, you may need to shut off the water to the entire building, api 6d ball valve.
Drain the water: Open a faucet or drain valve to allow the water in the pipes to drain completely.
Remove the old valve: Use a wrench to disconnect the old gate valve from the pipes. If the valve is soldered in place, use a torch to heat the joint and loosen the connection. If the valve is threaded, use a wrench to unscrew it from the pipes.
Clean the pipe ends: Use a pipe cutter or a hacksaw to remove any damaged or corroded sections of the pipe. Then, use sandpaper or a pipe reamer to clean the ends of the remaining pipes.
Install the new valve: Apply plumber's tape to the threads of the new valve, and then install the valve onto the pipes by tightening the connections with a wrench.
Turn on the water supply: Once the new valve is installed, turn on the main water supply valve and open the valve to let water flow through it. Check for any leaks and tighten any connections if necessary, forged ball valve.
Test the valve: Turn the valve on and off several times to ensure that it is working properly.
It's important to note that the exact steps and tools required may vary depending on the specific type of gate valve and the plumbing system. If you are unsure about how to replace a gate valve or encounter any problems during the process, it's recommended to consult with a professional plumber for assistance, carbon steel gate valves.
While gate valves can be used in a variety of applications, there are certain situations where they may not be the best choice. Some common situations where gate valves should not be used include:
Control valve applications: Gate valves are primarily designed for on/off isolation service and are not generally recommended for control valve applications where precise flow control is required, high temperature gate valves.
Low flow applications: Gate valves are typically designed to handle high flow rates and may not provide accurate flow control at low flow rates.
Viscous fluids: Gate valves may not work well with highly viscous fluids, as the gate can become stuck in the valve body and prevent proper operation.
Slurries and abrasive fluids: Gate valves may experience erosion and damage when used with abrasive fluids or slurries, as the gate and seat may become worn and damaged over time.
High-frequency cycling: Gate valves may not be suitable for applications that require frequent cycling, as the gate can become worn and damaged over time due to repeated opening and closing.
Cryogenic service: Gate valves may not be appropriate for use in cryogenic service, as the gate and seat materials may become brittle and fail under extreme low-temperature conditions.
In these situations, other types of valves, such as ball valves, globe valves, or butterfly valves, may be more suitable depending on the specific application requirements.
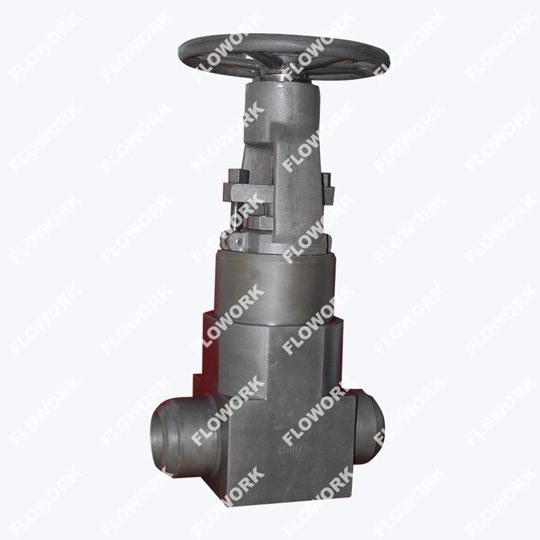
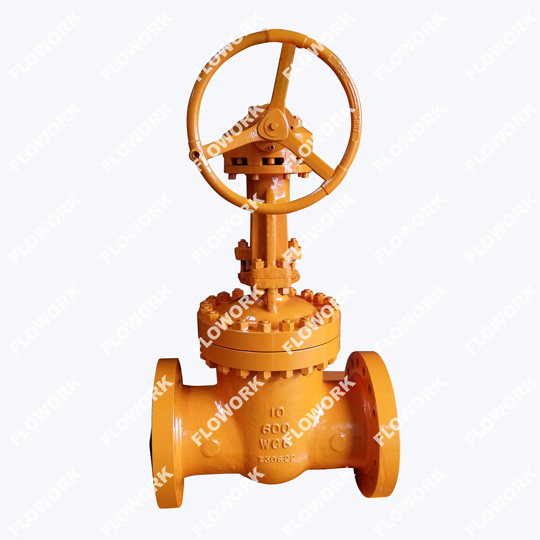
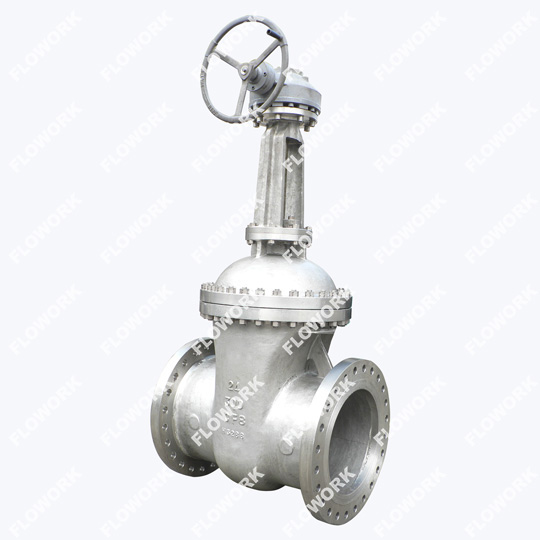
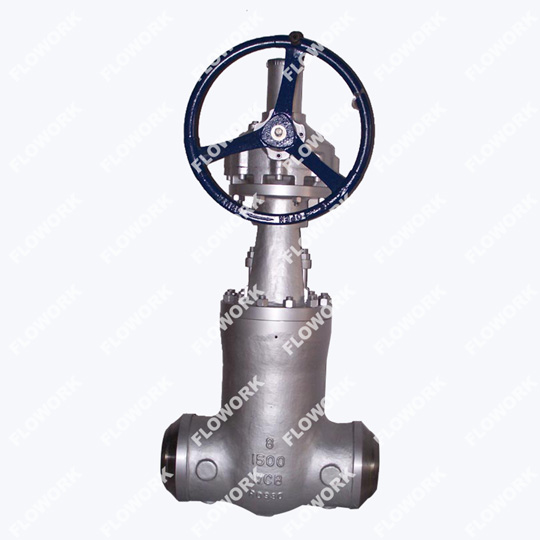
A manual bronze shut off gate valve typically consists of the following components:
Body: The body of the valve is typically made from bronze and is the main structure of the valve.
Bonnet: The bonnet is a cover that is placed over the top of the valve body and is used to seal the valve stem.
Stem: The stem is a long, narrow rod that connects the handwheel to the gate.
Gate: The gate is a flat metal plate that is located inside the valve body and controls the flow of fluid through the valve.
Seat: The seat is a ring-shaped piece that is located around the gate and provides a sealing surface when the gate is closed.
Handwheel: The handwheel is a mechanism that is used to open and close the valve by turning the stem.
To manufacture a manual bronze shut off gate valve, the following steps are typically involved:
Casting: The body, bonnet, gate, and seat are all cast separately using bronze.
Machining: Once the parts have been cast, they are then machined to ensure that they meet the required specifications.
Assembly: The valve is assembled by fitting the gate, stem, and seat into the body and then attaching the bonnet and handwheel.
Testing: Once the valve has been assembled, it is then tested to ensure that it is functioning correctly and that there are no leaks.
Overall, the manufacturing process for a manual bronze shut off gate valve involves several steps and requires precision and attention to detail to ensure that the valve is reliable and durable.
The inside of a gate valve typically consists of a gate, a seat, and a body. When the valve is open, the gate is lifted from the seat, allowing fluid to flow through the valve. When the valve is closed, the gate is lowered back onto the seat, creating a tight seal that prevents fluid from passing through the valve.
The gate is a flat, rectangular or circular piece of metal that slides up and down inside the body of the valve. When the gate is in the closed position, it rests against the seat, forming a seal that prevents fluid from flowing through the valve. The seat is typically a ring-shaped piece of metal or other material that is located around the perimeter of the valve body. The seat provides a sealing surface for the gate when it is in the closed position, ensuring that there is no leakage through the valve.
In addition to the gate and seat, the inside of a gate valve may also include a stem that connects the gate to the handwheel or actuator on the outside of the valve. The stem is used to lift and lower the gate as needed. Some gate valves also have a packing gland or other sealing mechanism around the stem to prevent leakage around the stem when the valve is in use.
The inside of a gate valve is designed to be smooth and streamlined to minimize fluid turbulence and pressure drop through the valve. The materials used in the construction of the valve are carefully selected to ensure that they are resistant to the fluid being transported and to minimize wear and corrosion over time.
Send us a message if you have any questions or request a quote.

A reply from our experts within 24 hours
The latest detailed product catalugue
One-stop service for your project